How to Use Green Screen on CapCut: What Content Creators Need to Know
In this tutorial, we will guide you through the process of using the green screen feature on CapCut. By mastering this technique, you'll be able to effortlessly replace the green background in your videos, opening up endless possibilities for creativity and visual effects.
Let's get started and unlock the full potential of green screen editing on CapCut!

In this article, you will learn:
- Why Does the Green Screen Have to Be Green?
- How to Achieve a Green Screen Background During Filming?
- How to Use Green Screen on CapCut?
- Final Thoughts About Green Screen on CapCut
Why Does the Green Screen Have to Be Green?
Before we dive into our tutorial on how to use the green screen feature on CapCut, it's important to understand why the green screen must be green in the first place.
During the post-production process, video editors need to perform a process called chroma keying, which involves separating the background color from the subject being filmed.
Similar to the Magic Wand tool in Photoshop, a specific color is selected for cutout. In most digital cameras, the sensor uses a Bayer filter, where the number of green pixels is twice that of red or blue pixels.
This makes the camera more sensitive to green, making it easier during the later stage of masking in post-production.
Additionally, green is the color with the least resemblance to human skin tone. Typically, human skin tones do not contain any green hues.
How to Achieve a Green Screen Background During Filming?
By following these steps, you can achieve a green screen background during filming and easily replace it with desired background images or videos in post-production, allowing for various creative and visual effects.
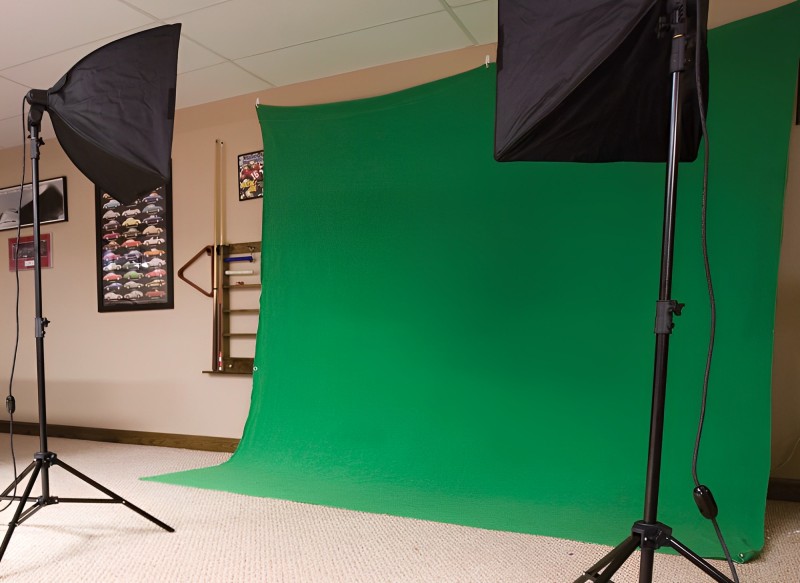
- Prepare the Green Screen Background: Use a green cloth or green wall as the green screen background. Ensure that the background is smooth without wrinkles and free from any objects of other colors. (Alternatively, you can purchase professional green screen equipment.)
- Set up lighting: Use sufficient lighting to ensure an even brightness on the green screen background, avoiding shadows or hotspots. Also, ensure a proper distance between the subject and the green screen to avoid color contamination.
- Post-production processing: When using CapCut or other video editing software, replace the green portion with the desired background images or videos. Adjust the transparency and edge details to achieve a more natural effect.
How to Use Green Screen on CapCut?
Now you can quickly edit these green screen materials on CapCut.
Don't Have Any Green Screen Footage Yet?
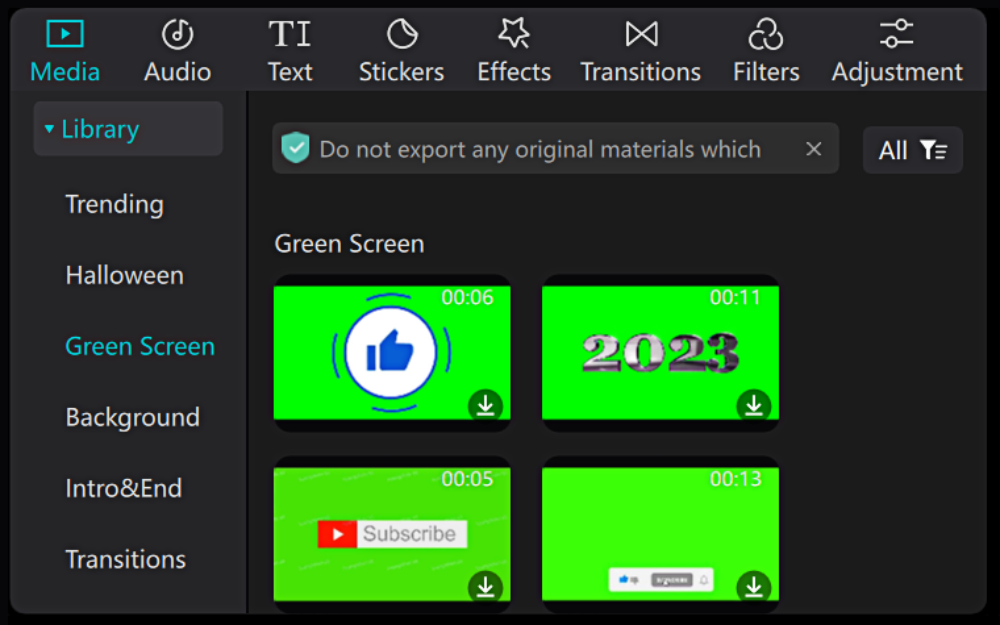
No worries. You can click on the Media workspace in the top-left corner of CapCut. In the Library, you will find the Green Screen category. CapCut provides you with a wide range of green screen materials to choose from. (Of course, you can also find plenty of free green screen materials online.)
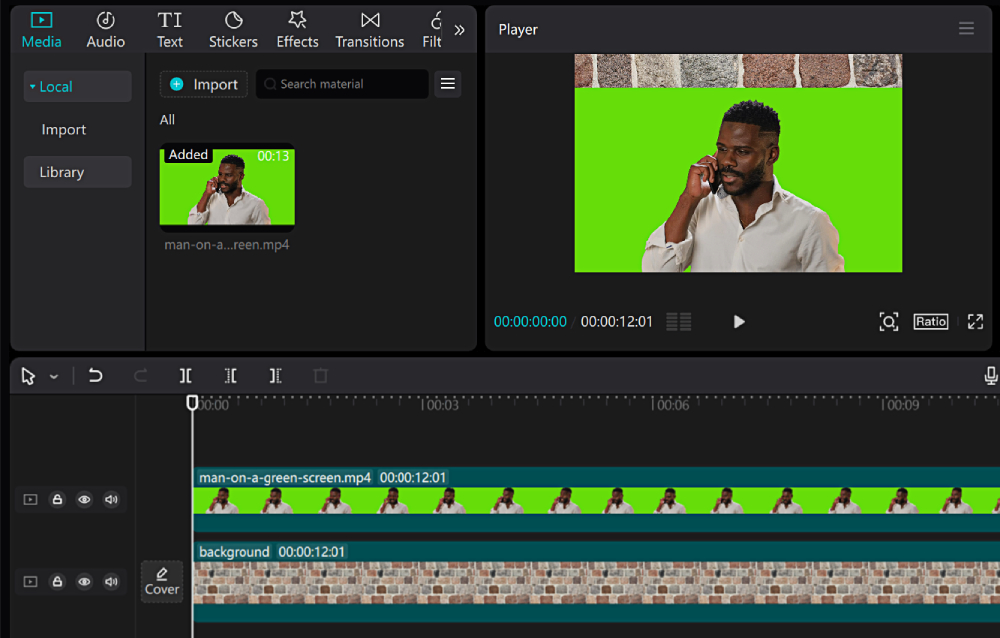
Open CapCut and create a new project. Import your pre-recorded green screen footage and background materials into the application. (As mentioned earlier, you can also choose to practice with the materials provided by CapCut.)
Drag the green screen footage and background materials onto the timeline. Make sure to place these two materials on separate video tracks. (The green screen footage on the upper track and the background material on the lower track, just like layers in Photoshop.)
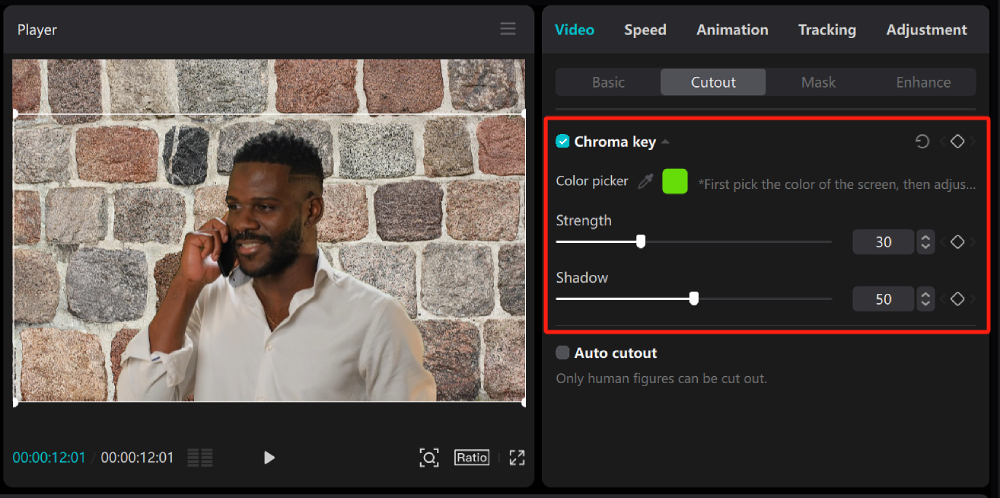
After adjusting the position of the materials, click on the green screen footage on the timeline. On the right side of the player, you will see a panel for adjusting parameters specific to that footage. Select the top Video tab and then switch to the Cutout tab below it.
At this point, you will see a checkbox for the Chroma key. Check this box, and a dropper tool will appear below. Use the dropper tool to sample the green color in the footage.
Adjust the Strength and Shadow parameters, and you will notice that CapCut intelligently removes the green screen, achieving a seamless blend between the subject and the new background.
You can watch the video below to see the green screen removal effect on CapCut.
You may have also noticed that below the Chroma key, there is an option called Auto cutout. Check this checkbox, and CapCut will automatically help you cut out human figures. You can try this option to see the effect, but if your footage is specifically green screen material, Chroma key would be the better choice.
Lastly, review the edited video and make any necessary adjustments to enhance the overall appearance. You can experiment with different backgrounds, effects, and overlays to add depth and creativity to your video.
Alternatively, utilize CapCut's other editing tools such as filters, transitions, and text to further enhance your video.
Final Thoughts About Green Screen on CapCut
In this tutorial, we have shared how to use the green screen on CapCut to create impressive videos. However, as content creators, we understand that spending unnecessary time on video editing may not be the wisest choice.
While CapCut is an incredibly user-friendly video editing software, there are tools available that can significantly enhance your video editing workflow. One such tool that we highly recommend is TourBox.

TourBox is a revolutionary device specifically designed to streamline the editing process for various creative applications, including video editing. Its ergonomic design and intuitive controls allow you to navigate through your editing software with ease and precision.
By eliminating the need for constant keyboard shortcuts and mouse movements, TourBox enables a smoother workflow, saving you valuable time during the editing process.
Tasks like adjusting parameters, navigating timelines, and applying effects become more efficient and intuitive, allowing you to focus on unleashing your creativity.
Our tutorial on how to use the green screen on CapCut comes to an end. We hope that it has been helpful for your content creation endeavors.