Create a stunning masterpiece when you follow these step-by-step instruction for how to make marbleized paper – a sensory STEAM project for kids and adults alike!
It’s always fun to use materials in new ways, and this is likely one way you’ve never used shaving cream before! Use our directions for how make marbleized paper and follow along with the questions included to help you make observations as you create! Not only will you have a wall-worthy finished project, you'll also learn some neat STEM skills along the way.
Materials:
- Shaving cream
- Paper (start with a heavier weight paper, like cardstock or construction paper)
- Food coloring* or washable paint such as liquid watercolor or tempera paint
- Popsicle sticks
(If you don’t have popsicle sticks, read the directions carefully and substitute in a different tool. Tooth picks are great for creating the marble effect and a ruler or spatula work well to remove the shaving cream from your paper at the end!)
*Warning: Food coloring can stain! If you're worried about mess, substitute washable paint. Either way, mess-friendly play clothes are recommended for this activity!

Directions:
STEP 1
- Spray some shaving cream onto a protected work surface.
STEP 2
- Spread the shaving cream out so it’s about ½ an inch thick.
How does the shaving cream feel? Is it a liquid or a solid? Do your best to describe it.

STEP 3
- Add a few drops of food coloring on top of the shaving cream. Make sure you leave some space between each drop.
What do you observe as you drip the food coloring onto the shaving cream? Does it mix in? Does it sit on top? Sink to the bottom? Spread out flat? What do you see happening?

STEP 4
- Use a popsicle stick to drag the food coloring around on the top of the shaving cream, creating a marbled effect.
Do the colors mix with the shaving cream? Do they stay separate? Do they mix with each other?

STEP 5
- When you’re happy with the marble you’ve created, place your paper on top of the shaving cream and food coloring and gently press down. Depending on how thick your paper is, you may see the marble start to show through the other side. Let it sit for about 5-10 seconds.
STEP 6
- Carefully remove your paper and place it shaving cream side up on a protected work surface.

STEP 7
- Use a popsicle stick to very gently scrape the shaving cream off your paper. This will likely take a few passes and it may help to remove the shaving cream from your popsicle stick between each pass.
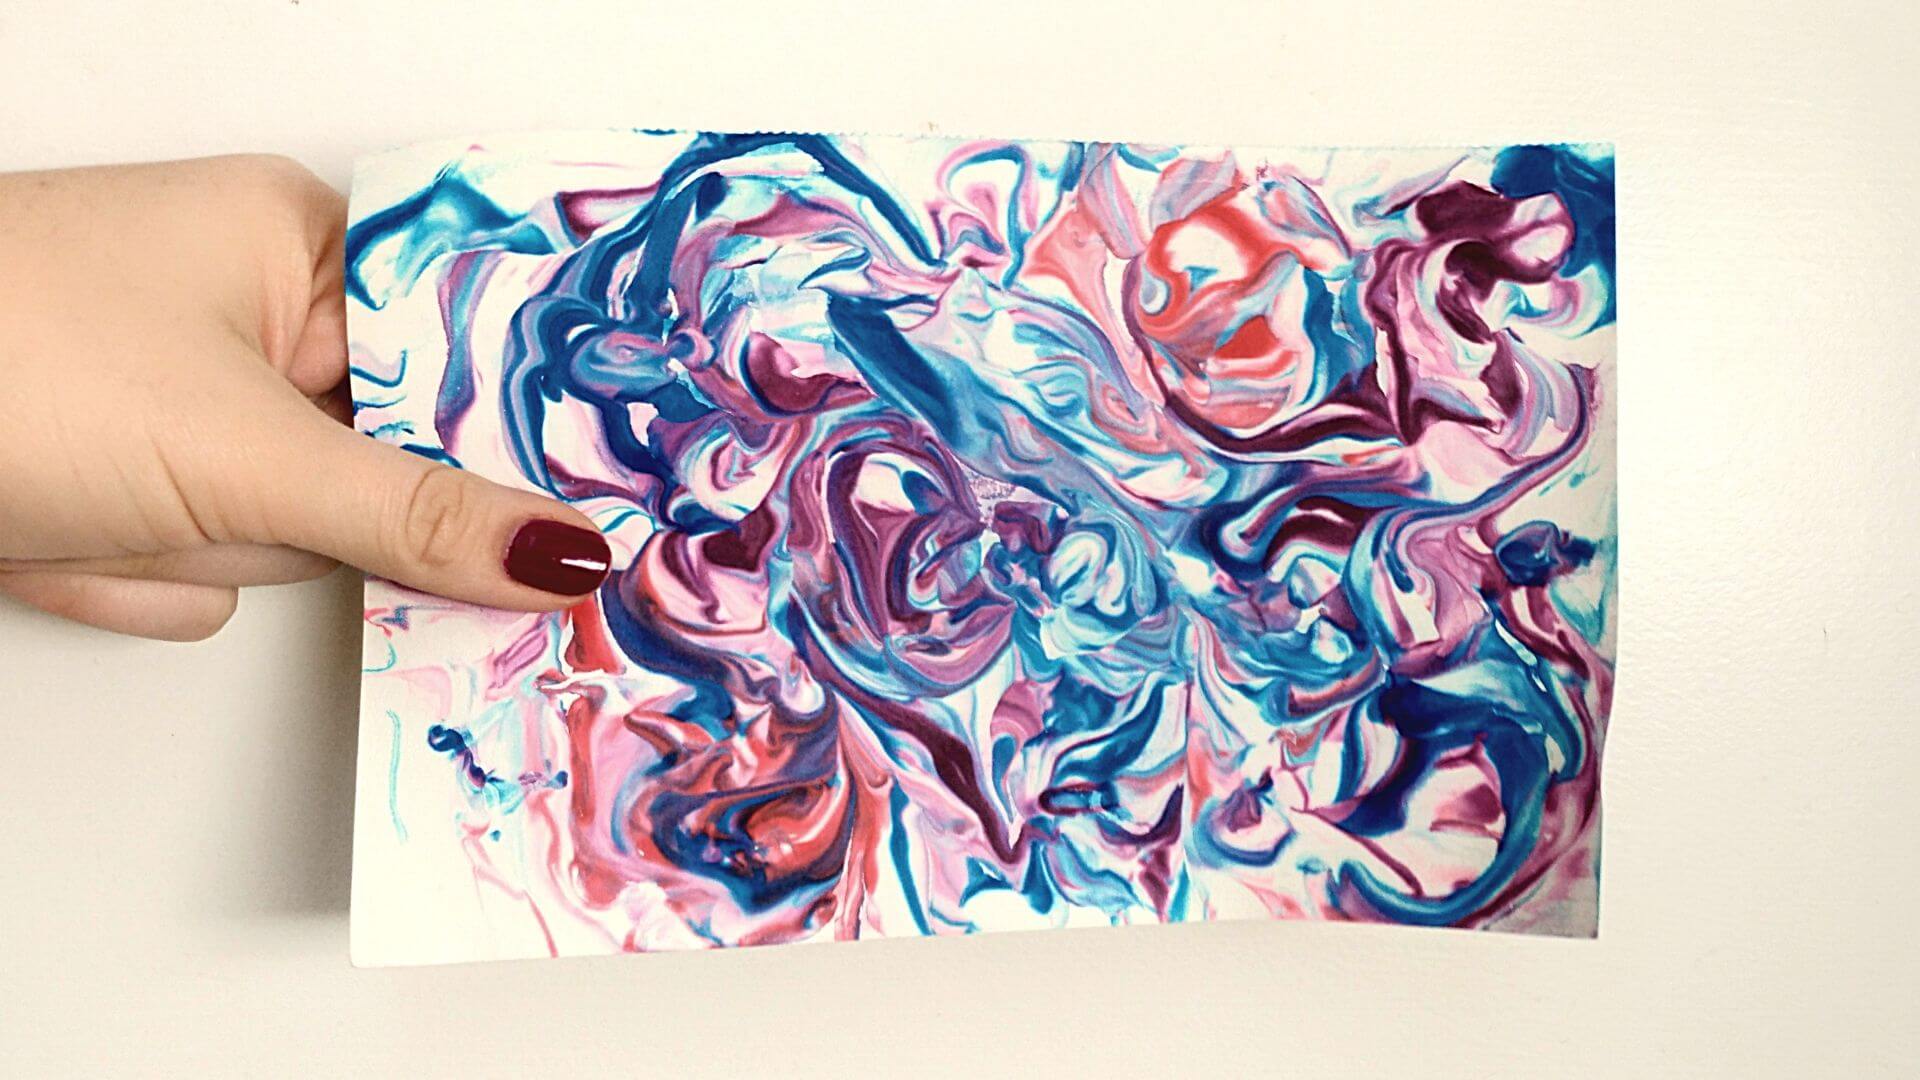
The food coloring has soaked into your paper, leaving behind a marbled pattern! How is the design on your paper similar to the design you saw on your shaving cream? How is it different?
STEP 8
- Let your paper dry for a few minutes. Once dry, use a tissue or paper towel to brush off any leftover little bits of shaving cream.

Display your marbleized paper with pride, or add it to a larger project! Be sure to share your mess-terpieces with us by submitting them to our Science Showcase here or tag Orlando Science Center and use #OSCatHome on social media! You might be featured on our channels.
NOTE: It’s best to let the paper dry completely before cutting it or writing on it.
Expand on the Activity!
- Try this again and try using more or less food coloring. How do your results change?
- Test out different kinds of paper. What happens when you try this with printer paper, newspaper, tissue paper, cardboard, or colored construction paper? What kind of paper works best?
- Experiment with making different shapes and patterns with the food coloring in the foam. How many different patterns can you make?
OSC At Home Emails
Get a round up of our latest activities and ideas delivered straight to your inbox so you don't miss a thing!
Find out when we release new resources by following us on social media!
Follow us on social media for even more science fun including fun facts, games, behind-the-scenes photos, and more!

![]()
![]()
![]()
Support OSC At Home
In these ever-changing times, it is our pleasure to adapt quality Orlando Science Center experiences to engage with everyone while they are safe at home. Please consider supporting our operating fund to ensure we can continue developing resources today and well into the future. Thank you for your generosity and support!