

If I love Paper; I adore Handmade paper. It was my first creative obsession, starting in early childhood & lasting until 1999 when unforeseen circumstances propelled me in other directions.
I’ve been going through all my craft stuff lately; stuff I’ve collected over the years… hoarded & treasured… & although I’ve moved on from my papermaking days long ago. I’ve been unable (or maybe unwilling) to let go of the papers themselves, keeping them safely stashed in air-tight containers in the corner of my present workshop.
However, it’s now time… I’ve decided to de-stash… you can read about this here…& you can view the for sale gallery here….


In amongst, the books, tools, & papermaking equipment, I found the following notes that I handed out to paper workshop students… I hope these summary notes are useful to other papermakers & for those beginning their journey into this absorbing craft…
The normal paper we buy & use is made of fibres that have been linked together to form flat sheets & generally made from wood pulp. However the wonderful part of papermaking is that you can make paper from any plant material like bark, stems, stalks, petals & leaves. Nowadays, recycled paper is the usual fibre source because it’s readily available, easy to learn & set up & leads to a high level of success quickly. Regardless of which process or combination of processes you choose, the papermaker will always be rewarded with beautiful, interesting & useful papers.
~~~~~~~~~~~~~~~~~~~~~~~~~~~
Papers throughout the ages:
Papyrus: was used by the ancient Egyptians, Greeks & Romans. It was a process of cutting long strips of Papyrus & placing them in two or three crosswise layers that were soaked & then pressed. The paper was more a woven item.
Parchment: was made popular by Eumenes, king of Pergamum (197-160/159 BC) when he couldn’t obtain papyrus from Egypt. Made from split sheep skin that has been thoroughly washed, embedded with lime, stretched & scraped continuously until all irregularities are removed & then dusted with chalk & polished with pumice.
Rice Paper: is made from the thin peeled dried pith of the Tetrapanax papyrifer tree that had its origins in Taiwan. The tree is cut into 30 cm x 5 cm sections, the pith is forced out & placed in bamboo canes to swell into larger diameters. When completed, sheets are shaved off with an extremely sharp knife.
Tapa Paper: is used in countries around the Equator: Polynesia, Malaysia, Indonesia, Sth America & Africa. It’s made from the inner portions of young Mulberry tree bark that has been scrapped away, soaked & beaten daily until it has elongated into a large sheet. Sheets are often full of holes so several sheets may be stuck together to form one complete sheet.
 ~~~~~~~~~~~~~~~~~~~~~~~~~~~
Equipment:
Basic tools & apparatus: required for both recycled & fibre papermaking
Blender: invest in a strong, high powered motor, one that can take a fair bit of hard work
Deckle & Mould: is your most important tool.
~ Stainless steel or copper mesh is essential.
~ I recommend purchasing your first Deckle & mould from a good craft shop or artist supplier & become comfortable with the process before making your own.
~ Either way, it’s a good maintenance practice to water-proof your deckle & mould with clear lacquer regularly.
~ Always store your deckles & moulds flat to avoid buckling.
Vats: need to be large enough to enable you the scoop the deckle & mould through the paper pulp
~ you can purchase large storage containers from Variety or Disposal stores, the lids come handy when vats are left unattended for a time. Coolite packing cases from your local fruit & veggie shop also work well.
Couching cloths: are layered between each sheet as you make the paper stack/post.
~ Felt is great, old woollen blankets also work really well.
~ keep couching cloths clean by rinsing them in clean water regularly, spin dry in a washing machine & always store flat.
~ if cloths are to be unused for a time, peg them on a line to throughly dry & avoid becoming mouldy
Marine Ply Boards: two thick pieces of Marine Ply large enough to accommodate the couching cloths, one sits at the base of you paper stack, the other sits on top. The couching cloths & paper sheets are pressed between these 2 boards
Press: I had a large hydraulic press that a friend built for me but book binders presses are also a popular choice & easy to used.
~ A simple press can be made with the two thick pieces of Marine Ply & a number of evenly place large G clamps (2, 4 or 6), depending on your stack.
Rollers: an aid to place newly made sheets onto surfaces
~ paint rollers are perfect.
Buckets: you’ll need lots: for water, pulp, fibre, etc.
Large strainers: stainless steel or plastic are ideal, avoid Aluminium, it tends to corrode & may spoil you paper.
Long tweezers: helpful for removing foreign objects from vats, newly scooped sheets, etc
Water-proof apron, rubber gloves & non-slip shoes: papermaking can be a wet & messy business, it’s up to you but, staying clean & safe is a consideration.
Additional tools & items if you are intending to make paper from plant fibres:
Caustic soda: required for the cooking process to reduce plant fibres into cellulose.
~ always handle with care & away from children
~ protective clothing & rubber gloves are essential when working with caustic soda
Stainless steel, copper or enamel vat: for cooking the plant fibre with caustic soda. Do not use aluminium, it corrodes.
Heating system: a gas burner, open fire (where allowed) or stove to heat the vat.
Litmus paper: for testing the pulp’s PH & available from most chemists
Sieves, mesh bags: again choose stainless steel, copper or plastic, not aluminium
Long handled stirring sticks: for moving fibre while cooking & removing hot, caustic fibre from vat
~~~~~~~~~~~~~~~~~~~~~~~~~~~

Making Recycled paper: I’m sure every papermaker has their own system & process, the following information is mine…
Gathering: any sort of paper will do, however, the better quality you start with the better the result. Good quality papers usually have a higher fibre content. I suggest staying away from glossy paper, like junk mail, it’s often full of fillers that make the recycled paper brittle
~ Don’t be deterred from printed paper, aside from creating interesting effects, the print often fades in the process
~ print shops, offices, schools are just a few sources for paper collection, most are willing to give it for free if you are prepared to pick it up regularly. (I gave handmade paper gifts to those business & held small papermaking demonstrations at schools as a Thank you)
Sorting: the first rule of sorting is to rid the collected paper from unwanted nasties: staples, envelope windows & sealing gum, pins, paper clips, sticky tape, stamps.
~ separate different colours, it eliminates the need to use dyes.
~ separate pure white paper to make beautiful white sheets
Soaking: shred or tear the collected paper & place it into vats or buckets with plenty of water & soak for at least 24 hours to allow the paper to soften, which helps in the pulping process & is less taxing on your blender.
Pulping: put small amounts of soaked paper with plenty of water into the blender; approx ratio of 1/4 paper to 3.4 water.
~ be kind to your blender, pulse in 20 second intervals, until a smooth consistency results. It’s slow but your blender is expensive so avoid burn out.
~ pour the smooth pulp into a sieve placed over a bucket & let it drain naturally. Do not press or allow it to get too dry.
~ pour the drained pulp into a bucket & use the drained water for your next blender load.
~ continue pulping & sieving until you have enough pulp for your needs or all soaked paper is used.
Prepping: paper pulp should be ready
~ prepare couching cloths, they should be damp, not wet. I found it easiest to throughly soak cloths & then spin dry in my washing machine.
~ have the bottom board with a couple of couching cloths ready to start your first sheet of your paper stack
~ have the press in position to receive the finished stack
Scooping: transfer an amount of prepared pulp into a water filled vat. The ratio of pulp to water determines the thickness of your paper sheet
~ stir the pulp & water with your hand to evenly mix the pulp & water
~ take the deckle & mould & scoop it through the mixture by dragging it towards yourself, lift, level off, then let the excess water drain off by tilting the deckle & mould backward, then from side to side. This is all done in one action which does take a little practice.
~ hold the deckle & mould until it drains, or place it on a rack over another vat to let it drain
~ if you’re unhappy with the sheet just made, you can kiss it off (yes, this is a papermaking term) by touching the surface of the deckle to the vat water.
~ view the quick papermaking pictorial tutorial here
Couching: once drained, carefully lift off the mould
~ roll the sheet onto the prepared board & couching cloths by touching the edge of the sheet onto the cloth then, with a rolling motion, press over the cloth & lift off
~ again, if unhappy with the sheet, kiss it off by toughing the cloth to the water surface
~ place another couching cloth over you paper sheet & continue the process to build the paper post (stack) to a manageable height – approx: 25 to 50 sheets
~ finish off with a couple of couching cloth & the 2nd board
Pressing: follow directions depending on the press used
~ when using G clamps, place them evenly around the paper post & screw them down evenly, a friend with an extra pair of hands can come in handy here.
~ as a general rule, you should aim at reducing you paper post by 2 thirds (2/3) or thereabouts. With G clamps you may have to come back from time to time & screw down some more.
~ try to press out as much water as possible without over-pressing which will stretch the sheet & cause it to buckle
~ leave the press to drain for at least 12 hours, to make paper handling easier
~ Pressing is a learned experience. What works for one doesn’t for another, so experiment & find what works best for you.
Drying: once pressing is complete, sheets can be dried by pegging the cloths with paper attached on a line
~ or, sheets can be rolled onto a surface (rough or smooth, depending on the effect required) with a clean paint roller. Place the cloth face down onto the surface, roll over the cloth then gently peel it away.
~ keep drying sheets away from direct sunlight, it can make the paper brittle
~ once throughly dry, your paper is ready to use.
~~~~~~~~~~~~~~~~~~~~~~~~~~~

Plant Fibre Paper:
Gathering: any plant fibre can be used, just be mindful that some will have more fibre content than others. It’s quite a process so aim to get the highest yield possible.
~ some of my favourites were Banana leaves, tree ferns, bracken fern, pineapple tops, red hot pokers, lemon grass, gum leaves, water reeds, tea tree, flax, Monsterio, bamboo leaves, just to name a few
Prepping: ~ green or dry plants all work well. If dry, I recommend soaking in water overnight before cooking day.
~ sort each plant type into its own bundle
~ cut fibre material into short lengths for easy handling; you’ll be working with caustic, long unruly bits flipping & splashing about could be nasty.
~ thick stems may need to be beaten flat for even cooking
~ prepare the caustic solution & add to the cooking vat
~ always add the caustic solution/granules to lots of water, not the other way round… it’s dangerous.
~ as a general rule, use no more than 1 tablespoon of caustic to 5 litres (9 pints) of water. The temptation to make stronger solutions can ruin your fibre.
Cooking the fibre: add the prepared plants to the vat & bring to the boil.
~ keep plants moving until fibres separate easily & are slimy to touch
~ cooking times vary depending on the plant
~ rubber gloves, protective clothing & shoes are essential. The cooking process often involves a lot of splashing; caustic splashes burn the skin.
Washing the fibre: is an important step
~ strain the cooked fibre into a copper, stainless steel or plastic colander, mesh bag or anything that will hold the fibre but allow water through.
~ wash fibres with running water until it runs clear or PH neutral.
~ depending on the plant, the fibre yield will have reduced greatly. Plant material has been washed away leaving only cellulose.
Blending the fibre: varies a little from recycled pulp
~ after washing, cut fibre into smaller pieces ready for blending.
~ put a small handful of cut fibre with approx: 2-3 cups of water. Pulse in 20 second intervals, 2 to 4 times.
~ pour this blended mix straight into the vat. The aim is to preserve as much fibre as possible
- From here, follow the same process as recycled paper
~ prepping
~ scooping
~ couching
~ pressing
Drying fibre Paper: paper made from fibre cannot be pegged out to dry on cloths like recycled paper. The paper will buckle & crinkle.
~ Sheets must be rolled onto a rigid surface: glass, laminex, desk top, windows are all good surfaces to try.
~ Place the couching cloth face down onto the surface, roll over the cloth then gently peel it away.
~ keep drying sheets away from direct sunlight, it can make the paper brittle
~ fibre paper sheets must be bone dry before removal from the surface, if removed too soon, they will curl
~~~~~~~~~~~~~~~~~~~~~~~~~~


Casting Paper: is a process of shaping paper into three-dimensional items using paper pulp & negative moulds. The following is a short summary of the method I used but, by no means, the only one… experiment, & discover what works for you.
Moulds: can be made from: plasticine, rubber latex, cardboard cut-outs, Styrofoam, or, my preferred method: plaster of Paris
~ with plaster of Paris moulds use equal parts plaster & water. Always add plaster to water, not the other way round.
~ keep moulds to a manageable size: ice-cream containers, small buckets, take-away containers, for easy handling & storage. Always oil containers before pouring in the mixed plaster for easy removal.
~ choose smooth cast objects without undercuts where paper can get trapped & difficult to remove from moulds: shells, marbles/balls, plastic moulding like frames/curtain rail ends, etc
~ brush cast object with cooking oil to prevent sticking to plaster, press cast object into wet plaster & allow to dry before gently lifting out, this is becomes the negative mould.
~ Allow the mould to dry completely (at least 24 hours), before applying a coat of undercoat paint to seal, & again, allow to dry completely before using the mould
Cast paper pulp: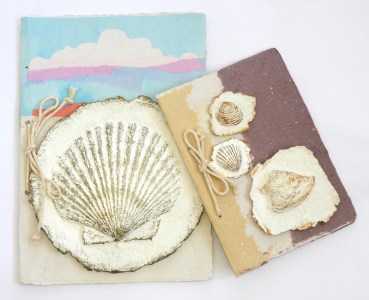
~ make pulp as usual – be vigilant about foreign bodies like staples etc,
~ strain pulp well but not too dry. It should be smooth & creamy, not lumpy.
~ place a thin tissue or paper towel over mould & gently pour in the pulp
~ with a sponge/absorbent cloth gently blot out the excess water, pressing more firmly as water is removed
~ carefully lift out the pressed object from moulds & allow to dry completely
~ apply a coat of sealer (undercoat), before decorating the cast paper object as desired
~~~~~~~~~~~~~~~~~~~~~~~~~~~


Recommended reading: I’m sure there are many papermaking books that I don’t know; the following are titles I’ve had for many years & always held me in good stead, however, some of them may now be out of print. Hopefully you’ll still find them in libraries. Google for more up-to-date titles.
- Paper-making – Jules Heller
- Creative Handmade Paper. How to make paper from recycled & natural materials – David Watson
- The papermaker’s Companion – Helen Hiebert
- The Art & Craft of Papermaking. Step by step instructions for creating distinctive handmade paper – Sophie Dawson
- Papermaking, from recycling to art – Jean G Kropper
- Paper Pleasures, from basic skills to creative ideas – Faith Shannon
- Making your own paper. An introduction to creative paper-making – Marianne Saddington